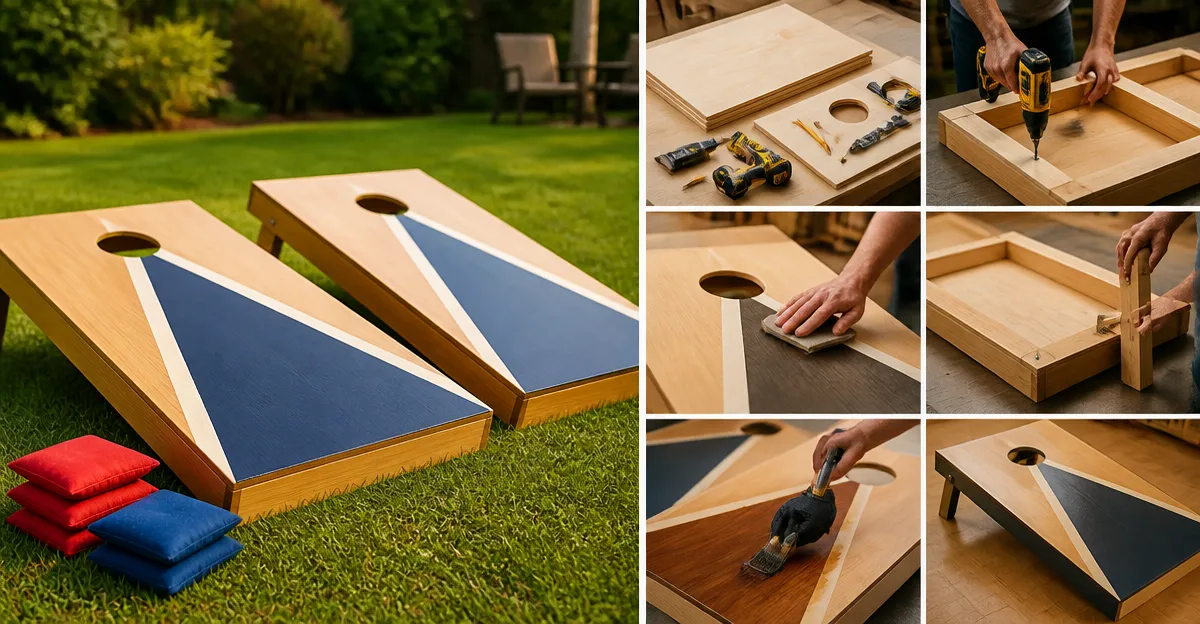
Introduction
In this guide the reader will learn how to construct a professional‑grade cornhole board from raw lumber, how to finish the surface for optimal slide, and how to create durable bean bags. The process is broken down into clear, numbered steps that can be followed by a competent DIY enthusiast. Understanding the construction methods will enable the builder to customize dimensions, colors, and branding for personal or commercial use. The guide also highlights ready‑made products that can serve as reference models or shortcuts for those who prefer a faster solution.
What You’ll Need
The essential materials include plywood or birch panels, pine framing lumber, galvanized steel bolts, wing nuts, sandpaper, wood stain or paint, and a set of regulation bean bags. Basic tools such as a circular saw, drill, measuring tape, carpenter’s square, and a screwdriver are also required. For those who desire a pre‑assembled benchmark, the GoSports Wooden Cornhole Set provides a finished example that can be measured and disassembled for reference. A portable carrying case such as the one included with the GoSports Solid Wood Cornhole Set is useful for transporting tools and finished boards.
Step 1: Determine Board Dimensions and Cut Panels
The official regulation size for a cornhole board is 48 inches wide by 24 inches high, with a 2‑inch deep front opening. Use a circular saw to cut two pieces of ½‑inch cabinet‑grade plywood or birch to these dimensions, ensuring a clean, square edge. The GoSports Vintage Wood Cornhole Set showcases a ½‑inch birch surface that provides the ideal amount of slide; measuring its boards can help verify accuracy. This step typically requires 30 minutes for precise measurement and cutting.
Step 2: Build the Frame with Pine Lumber
Construct a rectangular frame using 2‑by‑4 pine lumber, mitered at each corner to create a strong joint. Secure the frame with 3/8‑inch galvanized steel bolts and wing nuts, a method employed by the GoSports Wooden Cornhole Set. The bolts allow for easy disassembly and adjustment, and the pine provides a lightweight yet sturdy skeleton. Apply wood glue to each joint before tightening the bolts for additional stability.
Step 3: Attach the Playing Surface to the Frame
Place the cut plywood panel onto the assembled frame, aligning the edges precisely. Pre‑drill pilot holes to avoid splitting the wood, then secure the panel with 1‑inch wood screws spaced every 6 inches along the perimeter. The solid wood construction of the GoSports Solid Wood Cornhole Set demonstrates how a tight fit contributes to a stable playing surface that does not wobble during gameplay. After fastening, inspect the board for any gaps and fill them with wood filler if necessary.
Step 4: Install Retractable Legs
Attach the retractable legs to the underside of the frame using the same 3/8‑inch galvanized bolts and wing nuts found on the GoSports Wooden Cornhole Set. The legs should extend to a height of approximately 12 inches when fully deployed, providing a comfortable throwing angle of 12 degrees. Ensure that each leg locks securely in place to prevent accidental collapse during use. Test the stability by applying pressure to the board while it is fully extended.
Step 5: Sand and Finish the Surface
Begin with 80‑grit sandpaper to smooth any rough edges, then progress to 120‑grit for a fine finish. Remove dust with a tack cloth before applying a light brown wood stain, as used on the GoSports Wooden Cornhole Set, which enhances the natural grain and protects the wood from moisture. Allow the stain to dry for at least four hours, then apply a clear polyurethane coat for added durability. The finish should be non‑glossy to reduce glare during outdoor play.
Step 6: Paint or Customize the Boards
If a personalized design is desired, apply a coat of latex paint after the stain has cured, or use vinyl decals that can be adhered to the varnished surface. The GoSports Vintage Wood Cornhole Set features full‑color printing directly onto the wood, illustrating the visual impact of a high‑quality custom design. Allow each coat of paint to dry for at least two hours before adding additional layers or graphics. Seal the final design with a matte clear coat to protect the artwork from UV fading.
Step 7: Create or Acquire Bean Bags
Regulation bean bags measure 6 inches by 6 inches and weigh between 14 and 16 ounces each. Fill eight canvas bags with recycled plastic pellets, a feature highlighted by the GoSports Solid Wood Cornhole Set, which ensures the bags remain dry and maintain consistent weight. Sew the seams securely using a heavy‑duty thread and a double‑stitched seam for longevity. Store the finished bags in a tote bag for easy transport.
Step 8: Test Gameplay and Adjust
Set the boards on a level surface and measure the distance between the front edges; the official distance is 27 feet for adult play. Conduct several practice throws to assess the board’s slide and the bag’s trajectory. If the bags slide too quickly, sand the surface lightly; if they stop too abruptly, apply a thin coat of additional stain. Adjust the leg height if the throwing angle feels uncomfortable, ensuring the board remains stable throughout the session.
Tips & Pro Tips
- Use a carpenter’s square to verify that all corners are exactly 90 degrees before gluing.
- Apply anti‑vibration gaskets under the legs, a feature found on the OUTBALL Cornhole Set, to reduce board movement during intense play.
- When painting, work in a well‑ventilated area and wear a dust mask to avoid inhaling fine particles.
- Label each bean bag with a colored marker to differentiate teams and prevent confusion during tournaments.
Troubleshooting
If the board warps after exposure to moisture, re‑apply a waterproof sealant and store the board in a dry location when not in use. Should the legs feel loose, tighten the wing nuts and add a lock‑tight washer for extra security. In the event that the bean bags lose weight over time, replace the plastic pellets with new ones to restore proper balance. Persistent wobble may indicate uneven leg length; measure each leg and sand the longer one slightly to achieve uniform height.
Conclusion
This guide has outlined each phase of constructing a high‑quality cornhole board, from selecting raw materials to finishing and testing the final product. By following the step‑by‑step instructions, the builder can achieve a durable, regulation‑size board that can be customized for any occasion. The recommended products provide reliable reference points and convenient accessories that can accelerate the building process. Armed with these skills, the reader is encouraged to build additional boards for family gatherings, tailgate parties, or even a small business venture.
Products Mentioned in This Guide
Frequently Asked Questions
What materials are needed to build a professional‑grade cornhole board?
You’ll need plywood or birch panels, pine framing lumber, galvanized steel bolts, wing nuts, sandpaper, and wood stain or paint, plus a set of regulation bean bags.
Which tools are essential for constructing a cornhole board?
A circular saw, drill, measuring tape, carpenter’s square, and a screwdriver are the basic tools required.
How can I finish the board surface for optimal slide?
Sand the surface smooth, then apply a coat of wood stain or paint followed by a clear sealant to create a low‑friction finish.
Can I use a pre‑made set as a reference for dimensions?
Yes, a ready‑made set like the GoSports Wooden Cornhole Set can be measured and disassembled to verify correct board dimensions.
What are the regulations for the bean bags used in cornhole?
Regulation bean bags typically weigh 14–16 oz, are filled with corn kernels or synthetic beads, and measure 6 × 6 inches.